> ## Documentation Index
> Fetch the complete documentation index at: https://docs-dev.byterover.dev/llms.txt
> Use this file to discover all available pages before exploring further.
# Quickstart
> Get up and running with ByteRover CLI in minutes
Prefer a visual workflow? See [the Local Web UI](/local-web-ui/overview).
## Step 1: Install
**macOS Apple Silicon (M1/M2/M3+)**, **macOS Intel**, **Linux x86\_64**, and **Linux ARM64** only. On Windows — use the **npm** tab.
No Node.js required:
```bash theme={null}
curl -fsSL https://byterover.dev/install.sh | sh
```
The installer adds `brv` to your PATH automatically. If `brv` isn't found after reopening your shell, run:
```bash theme={null}
export PATH="$HOME/.brv-cli/bin:$PATH"
```
Requires [Node.js 20+](https://nodejs.org/en/download/):
```bash theme={null}
npm install -g byterover-cli
```
```bash theme={null}
brv --version
```
ByteRover CLI runs in WSL but requires your development environment to be fully within WSL:
* **Environment separation** — Windows and WSL are separate environments. If you install ByteRover CLI in WSL, your coding agents must also access the WSL environment.
* **Performance** — Keep project files in the WSL file system (`~/projects`) rather than `/mnt/c/...` for best performance.
* **Credential storage** — ByteRover CLI stores credentials using encrypted file-based storage in `~/.local/share/brv/`.
* We recommend **WSL 2** for better compatibility.
## Step 2: Start ByteRover
Navigate to your project and run `brv` to launch the TUI:
```bash theme={null}
cd path/to/your/project
brv
```
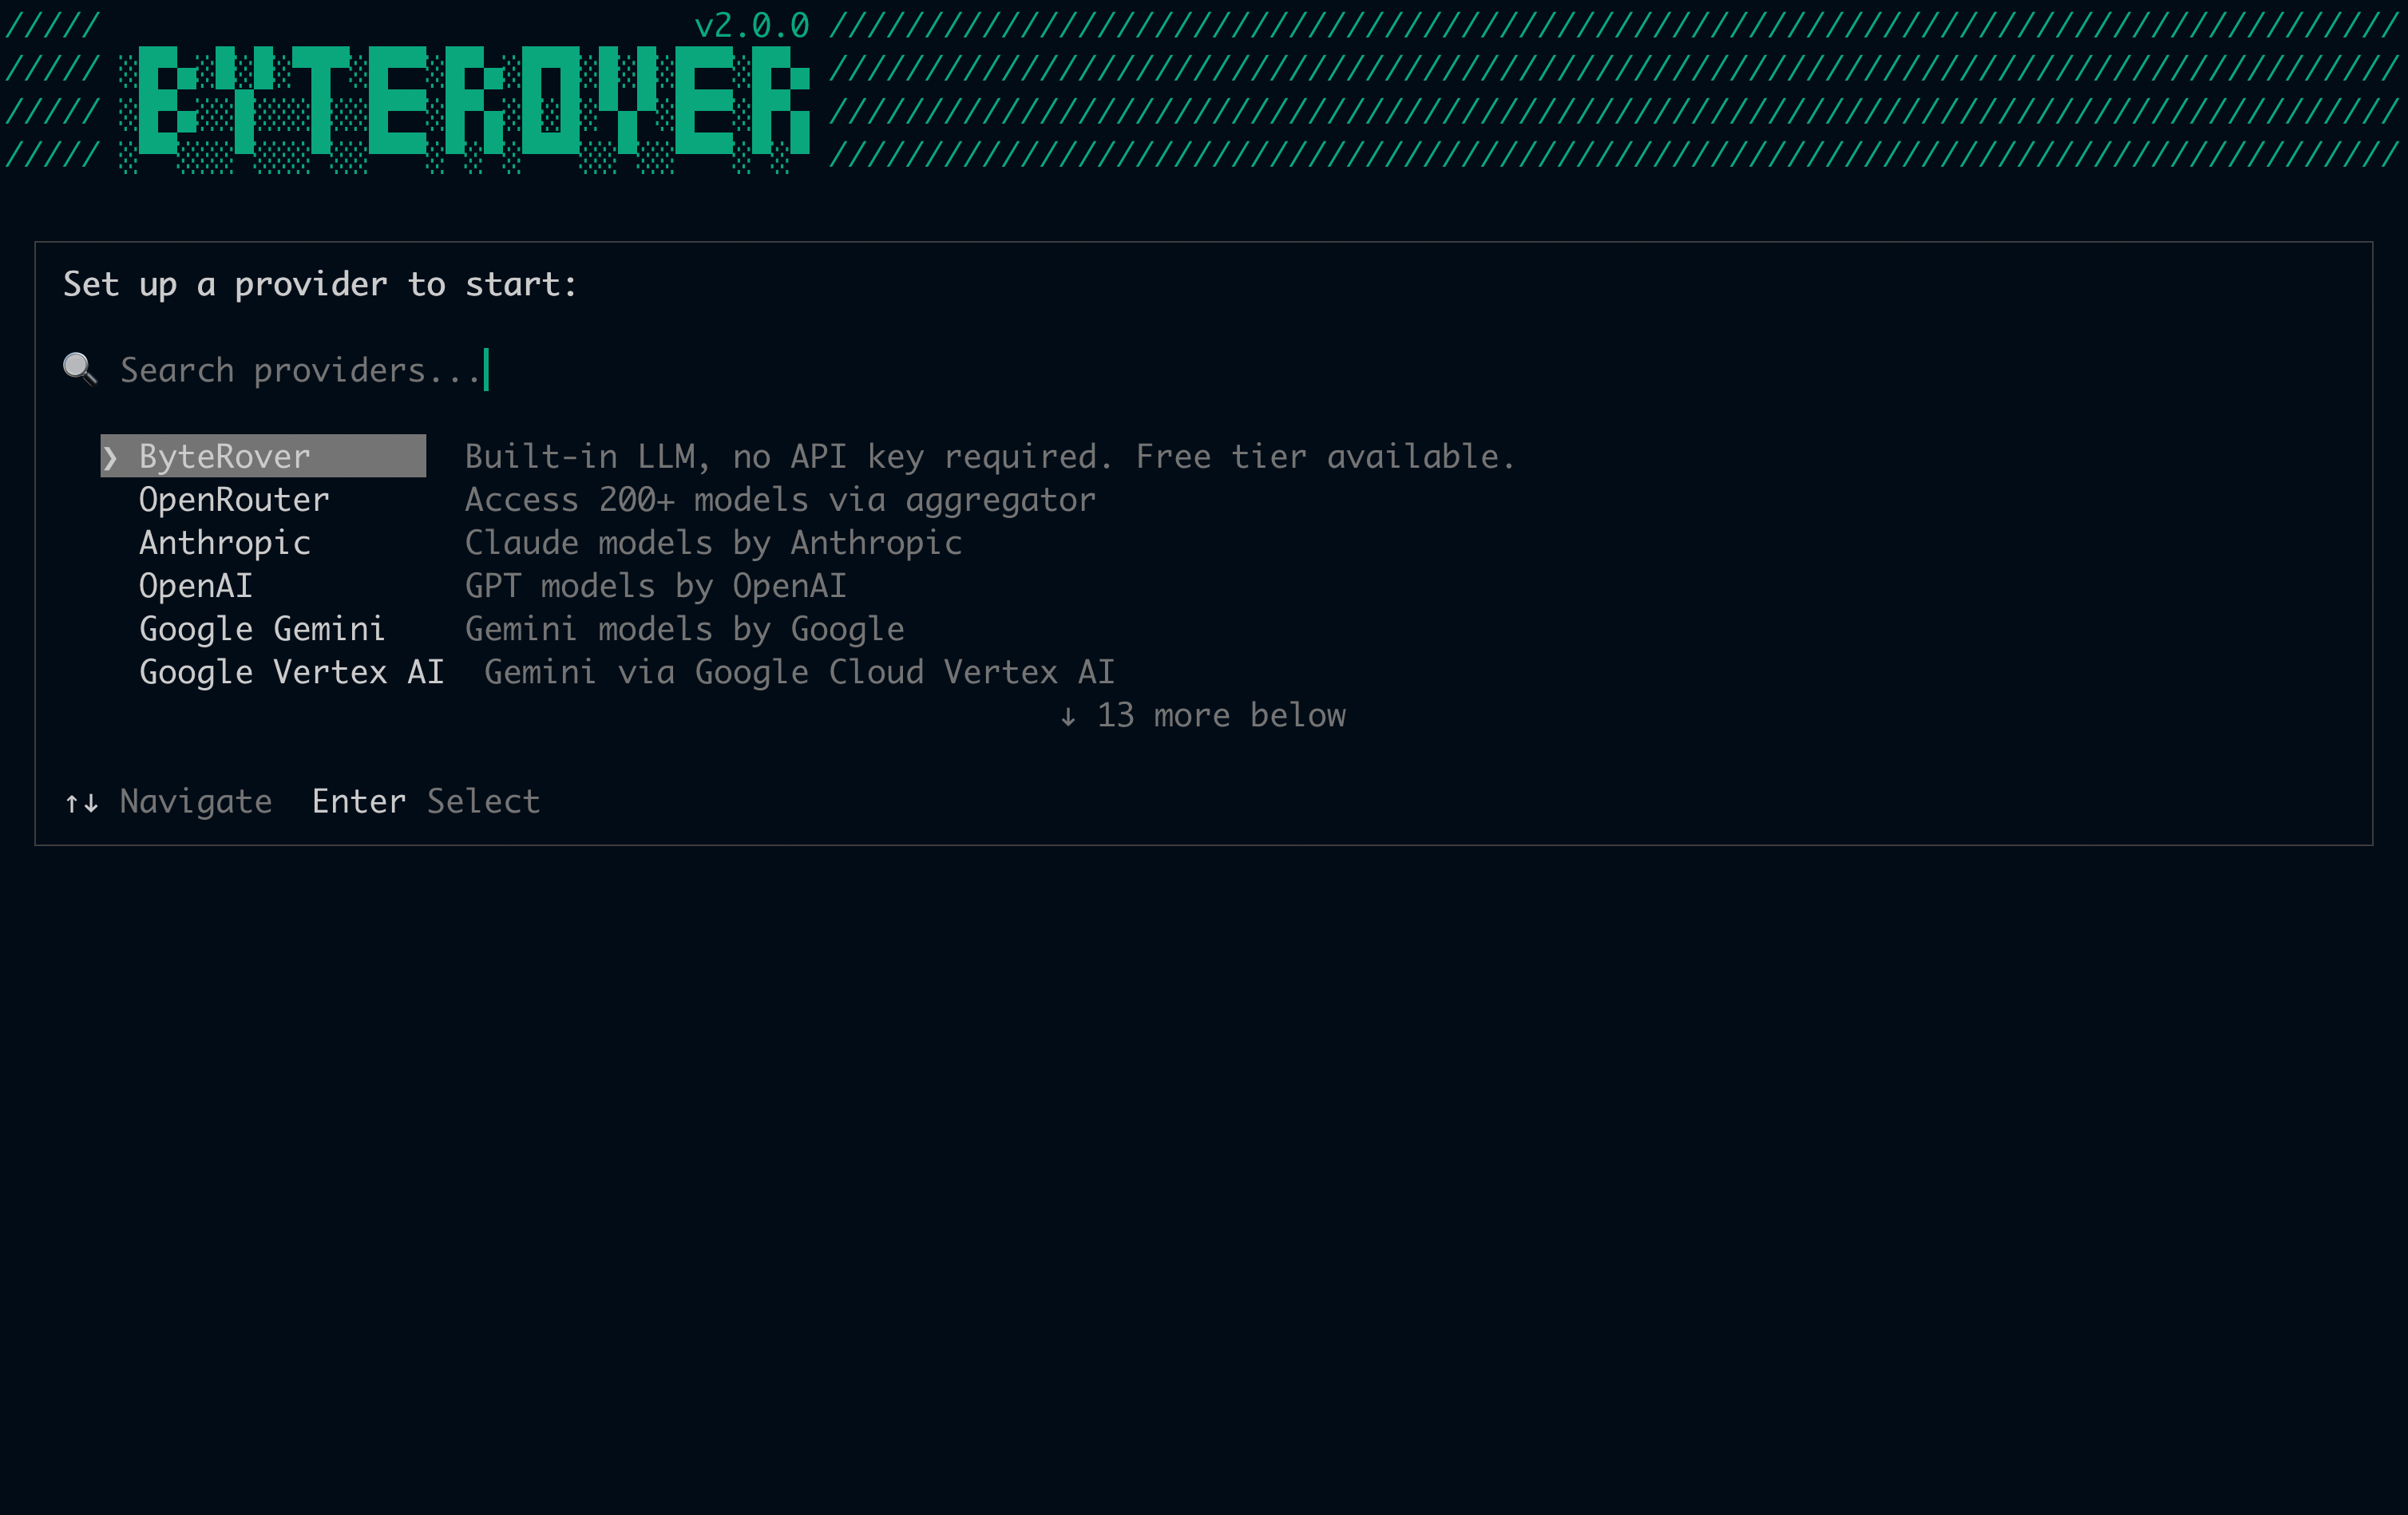
On first launch, ByteRover immediately shows the provider selector. Choose any of the 18 supported external providers — just provide an API key (or use OAuth for OpenAI), no ByteRover account needed. ByteRover's built-in LLM is also available with limited free usage, but requires a logged-in ByteRover account.
Selecting the ByteRover built-in provider when not logged in will prompt you to sign in via your browser. Third-party providers do not require a ByteRover account — only an API key. In `brv webui`, **ByteRover** is pinned at the top of the picker with a **Native** badge and the sign-in popup opens directly — no extra confirmation step.
 Later, you can use this to switch to a different provider:
```
/providers
```
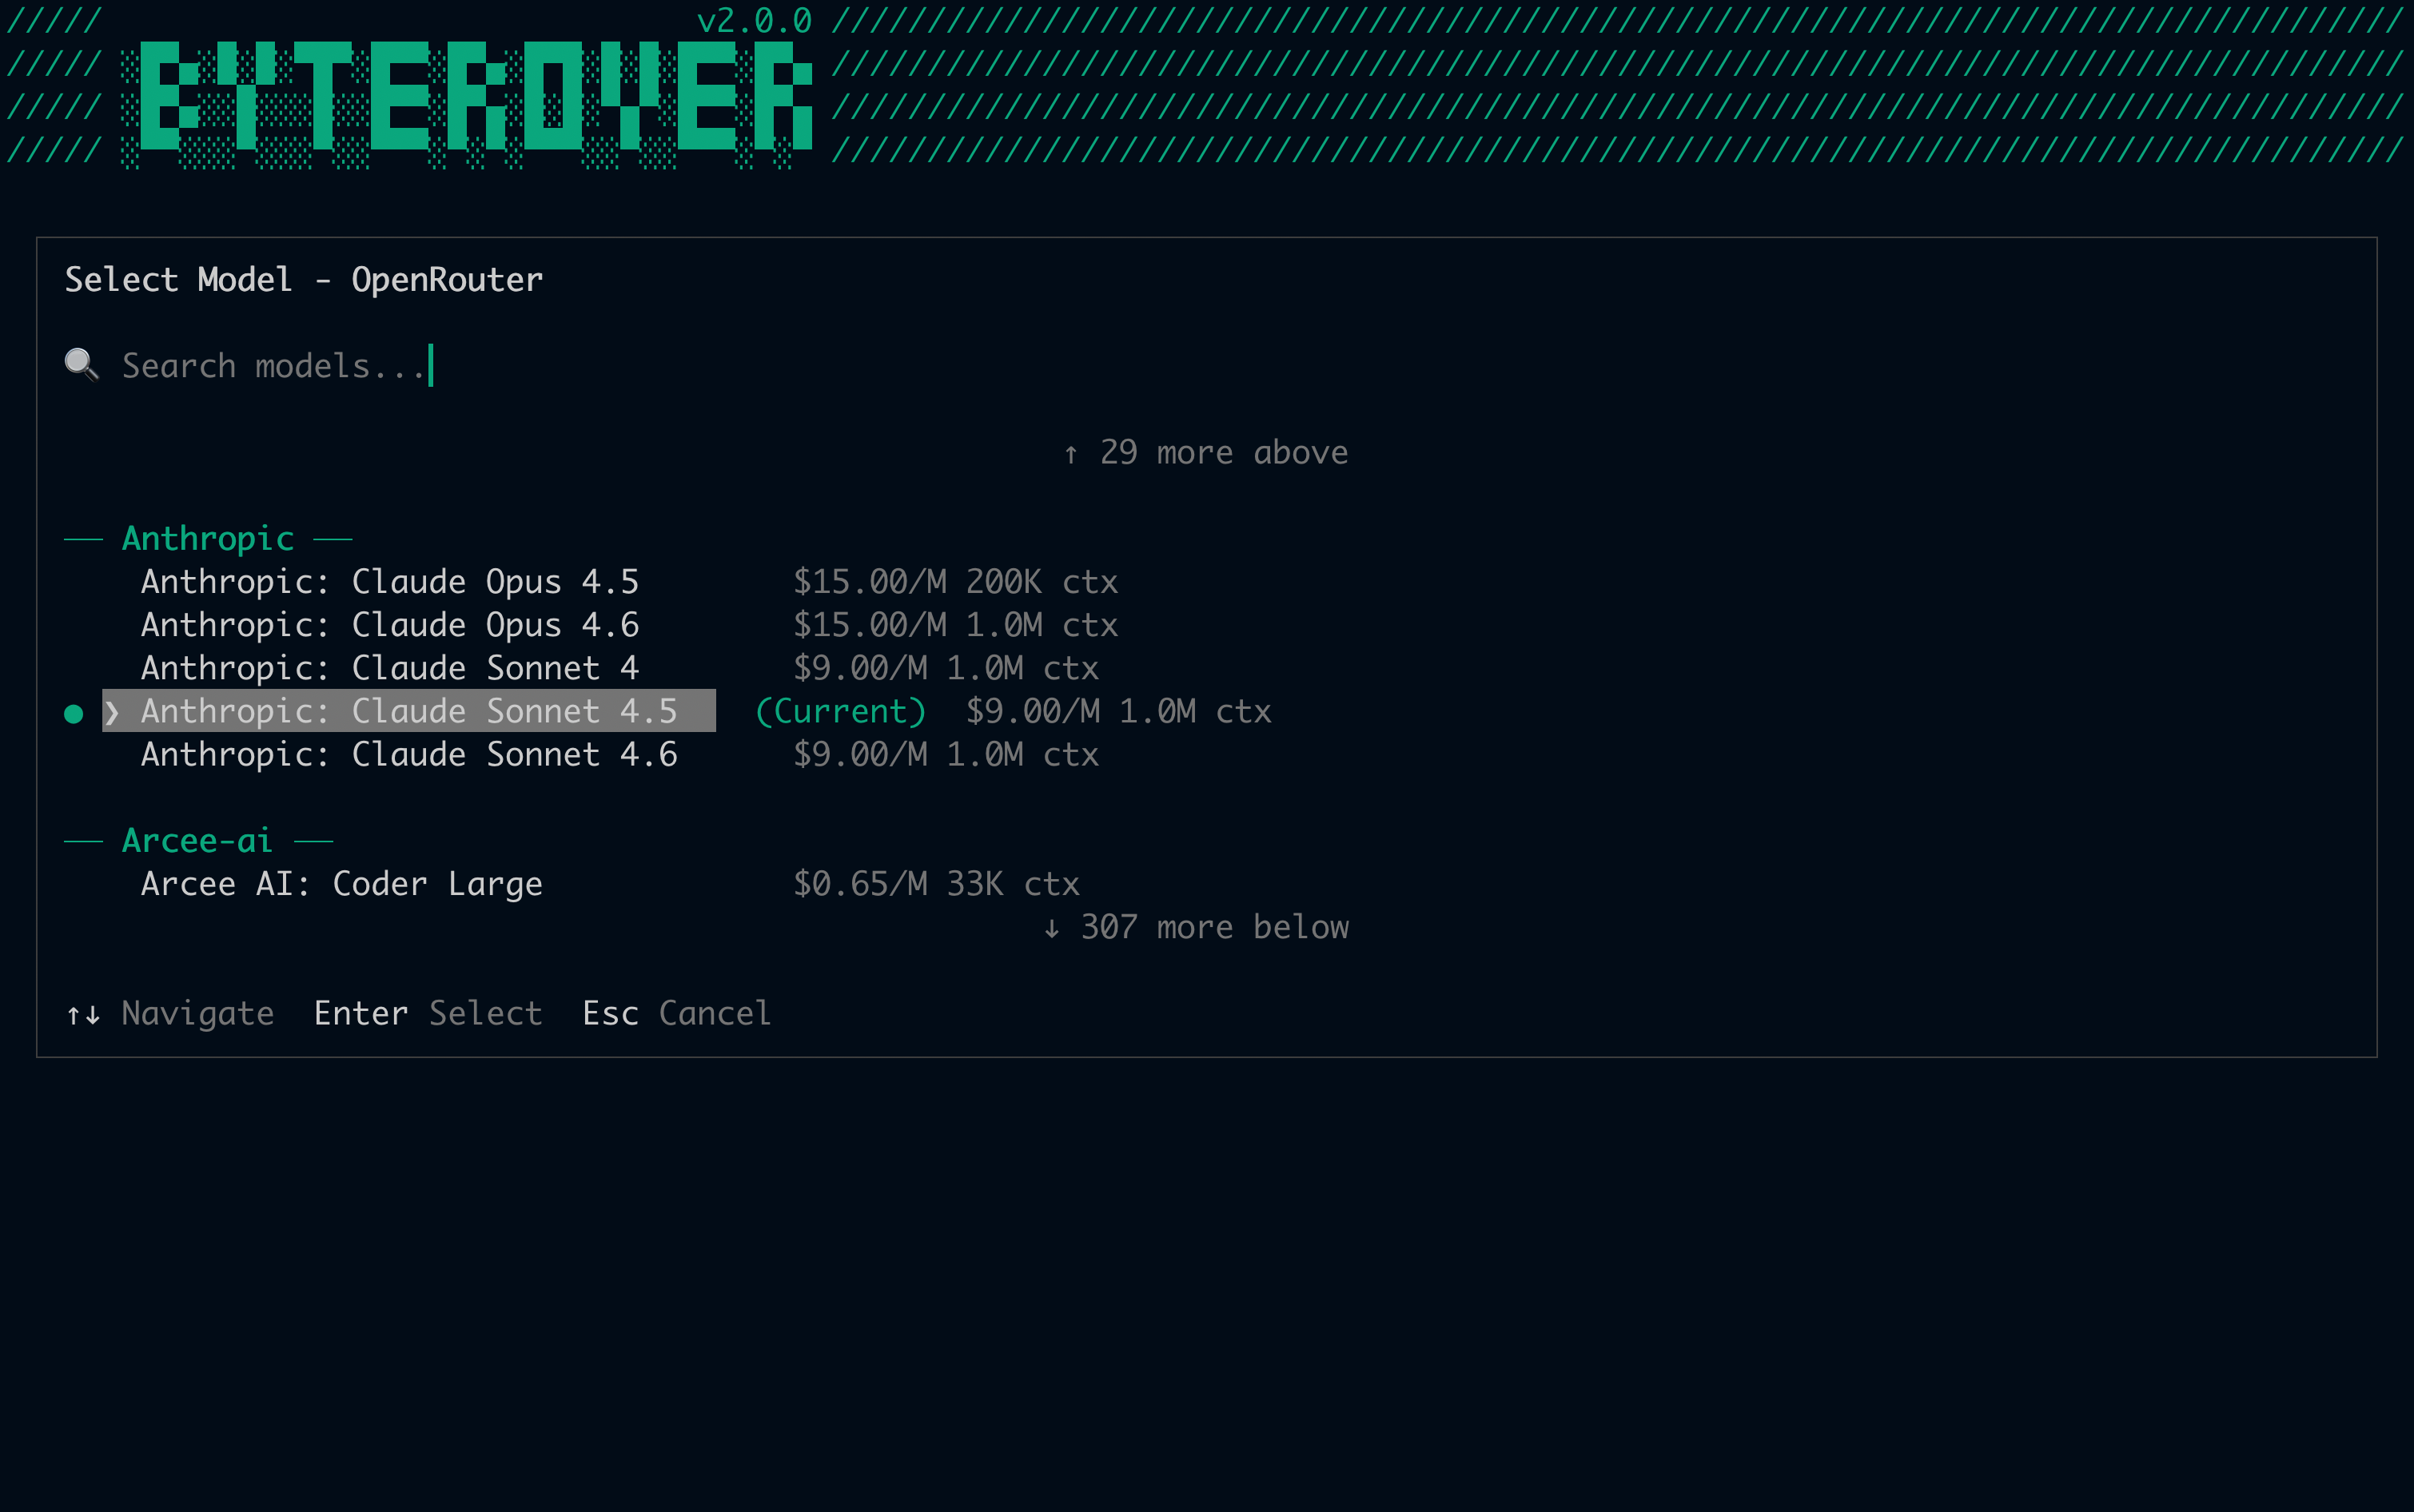
After selecting an external provider, ByteRover immediately prompts you to pick a model:
Later, you can use this to switch to a different provider:
```
/providers
```
After selecting an external provider, ByteRover immediately prompts you to pick a model:
 To switch to a different model at any time:
```
/model
```
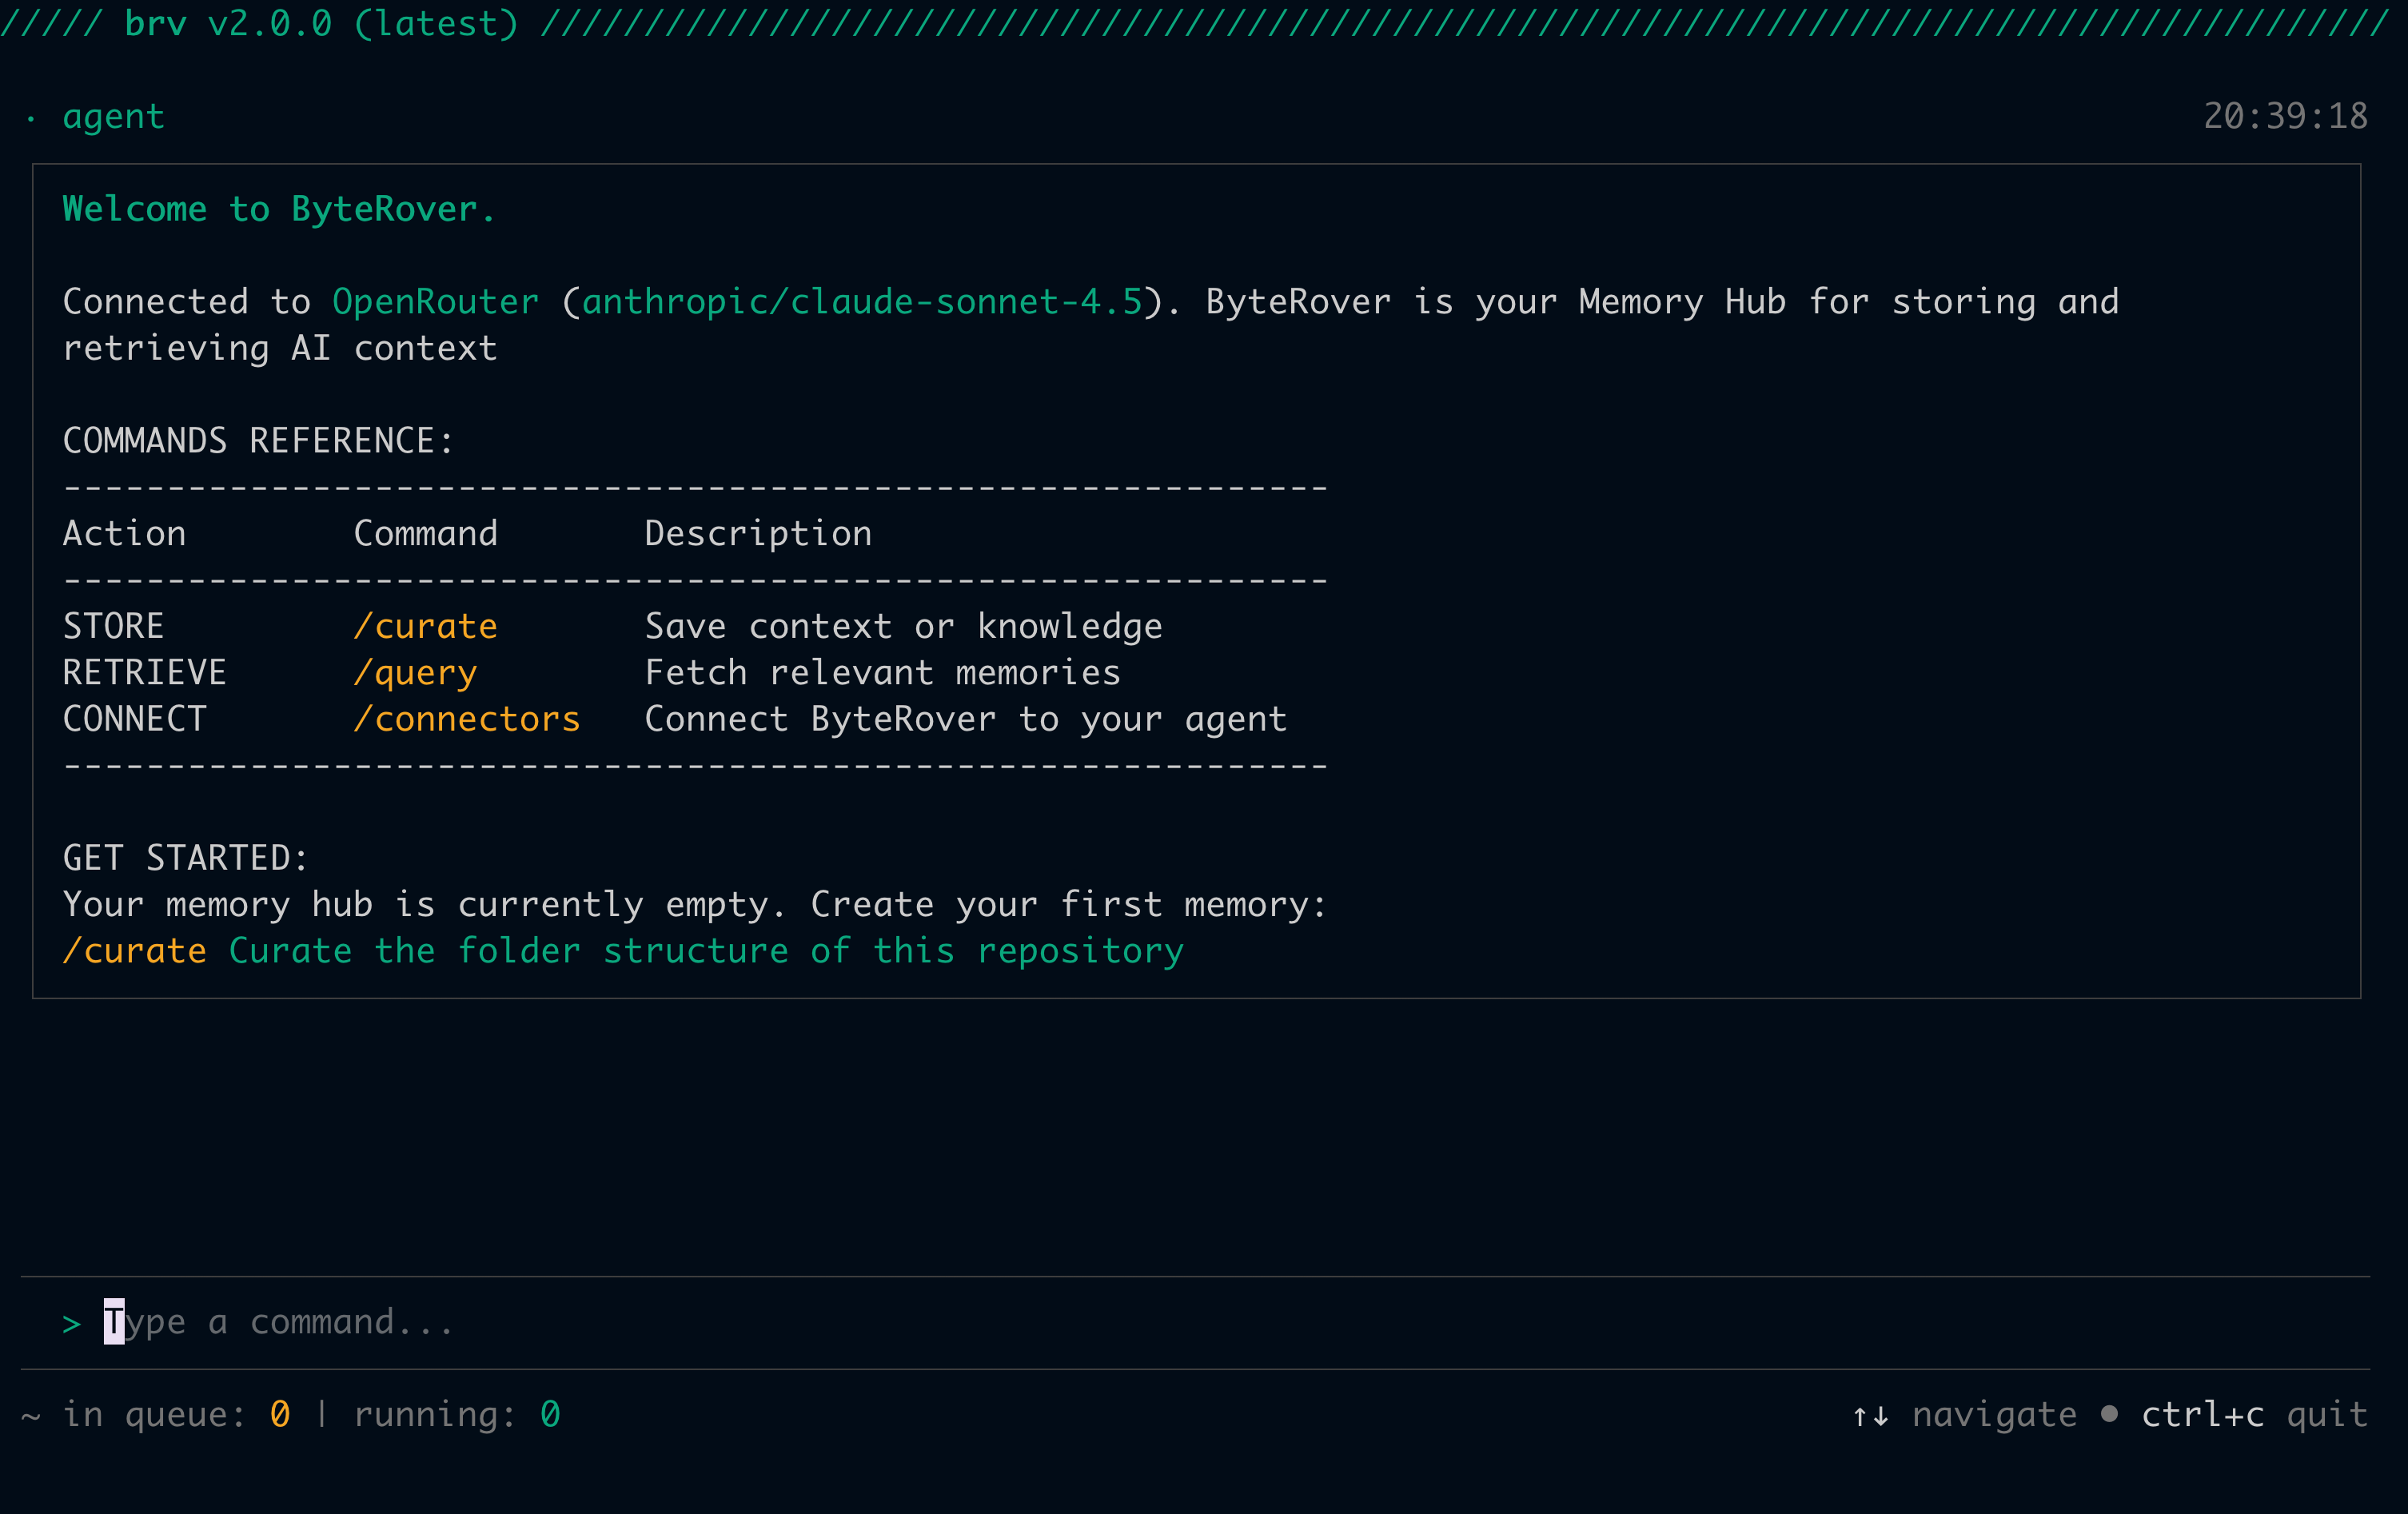
Once your provider and model are set, you'll reach the main TUI with a welcome message:
To switch to a different model at any time:
```
/model
```
Once your provider and model are set, you'll reach the main TUI with a welcome message:
 ```bash theme={null}
cd path/to/your/project
```
Connect a provider and set a model in one step:
```bash theme={null}
brv providers connect openrouter --api-key your-key --model anthropic/claude-sonnet-4.5
```
Or connect via OAuth (opens browser):
```bash theme={null}
brv providers connect openai --oauth
```
To switch providers or models later:
```bash theme={null}
brv providers switch
brv model switch
```
The ByteRover built-in provider requires authentication. Run `brv login` before using `brv providers connect byterover` — it opens your browser for OAuth by default. On CI or a remote shell, pass `brv login --api-key ` instead. Third-party providers only need an API key.
## Step 3: Connect your coding agent
Set up the connector so your coding agent (Cursor, Claude Code, Claude Desktop, Windsurf, etc.) can use ByteRover's context.
Run `/connectors` in the TUI:
```
/connectors
```
```bash theme={null}
cd path/to/your/project
```
Connect a provider and set a model in one step:
```bash theme={null}
brv providers connect openrouter --api-key your-key --model anthropic/claude-sonnet-4.5
```
Or connect via OAuth (opens browser):
```bash theme={null}
brv providers connect openai --oauth
```
To switch providers or models later:
```bash theme={null}
brv providers switch
brv model switch
```
The ByteRover built-in provider requires authentication. Run `brv login` before using `brv providers connect byterover` — it opens your browser for OAuth by default. On CI or a remote shell, pass `brv login --api-key ` instead. Third-party providers only need an API key.
## Step 3: Connect your coding agent
Set up the connector so your coding agent (Cursor, Claude Code, Claude Desktop, Windsurf, etc.) can use ByteRover's context.
Run `/connectors` in the TUI:
```
/connectors
```
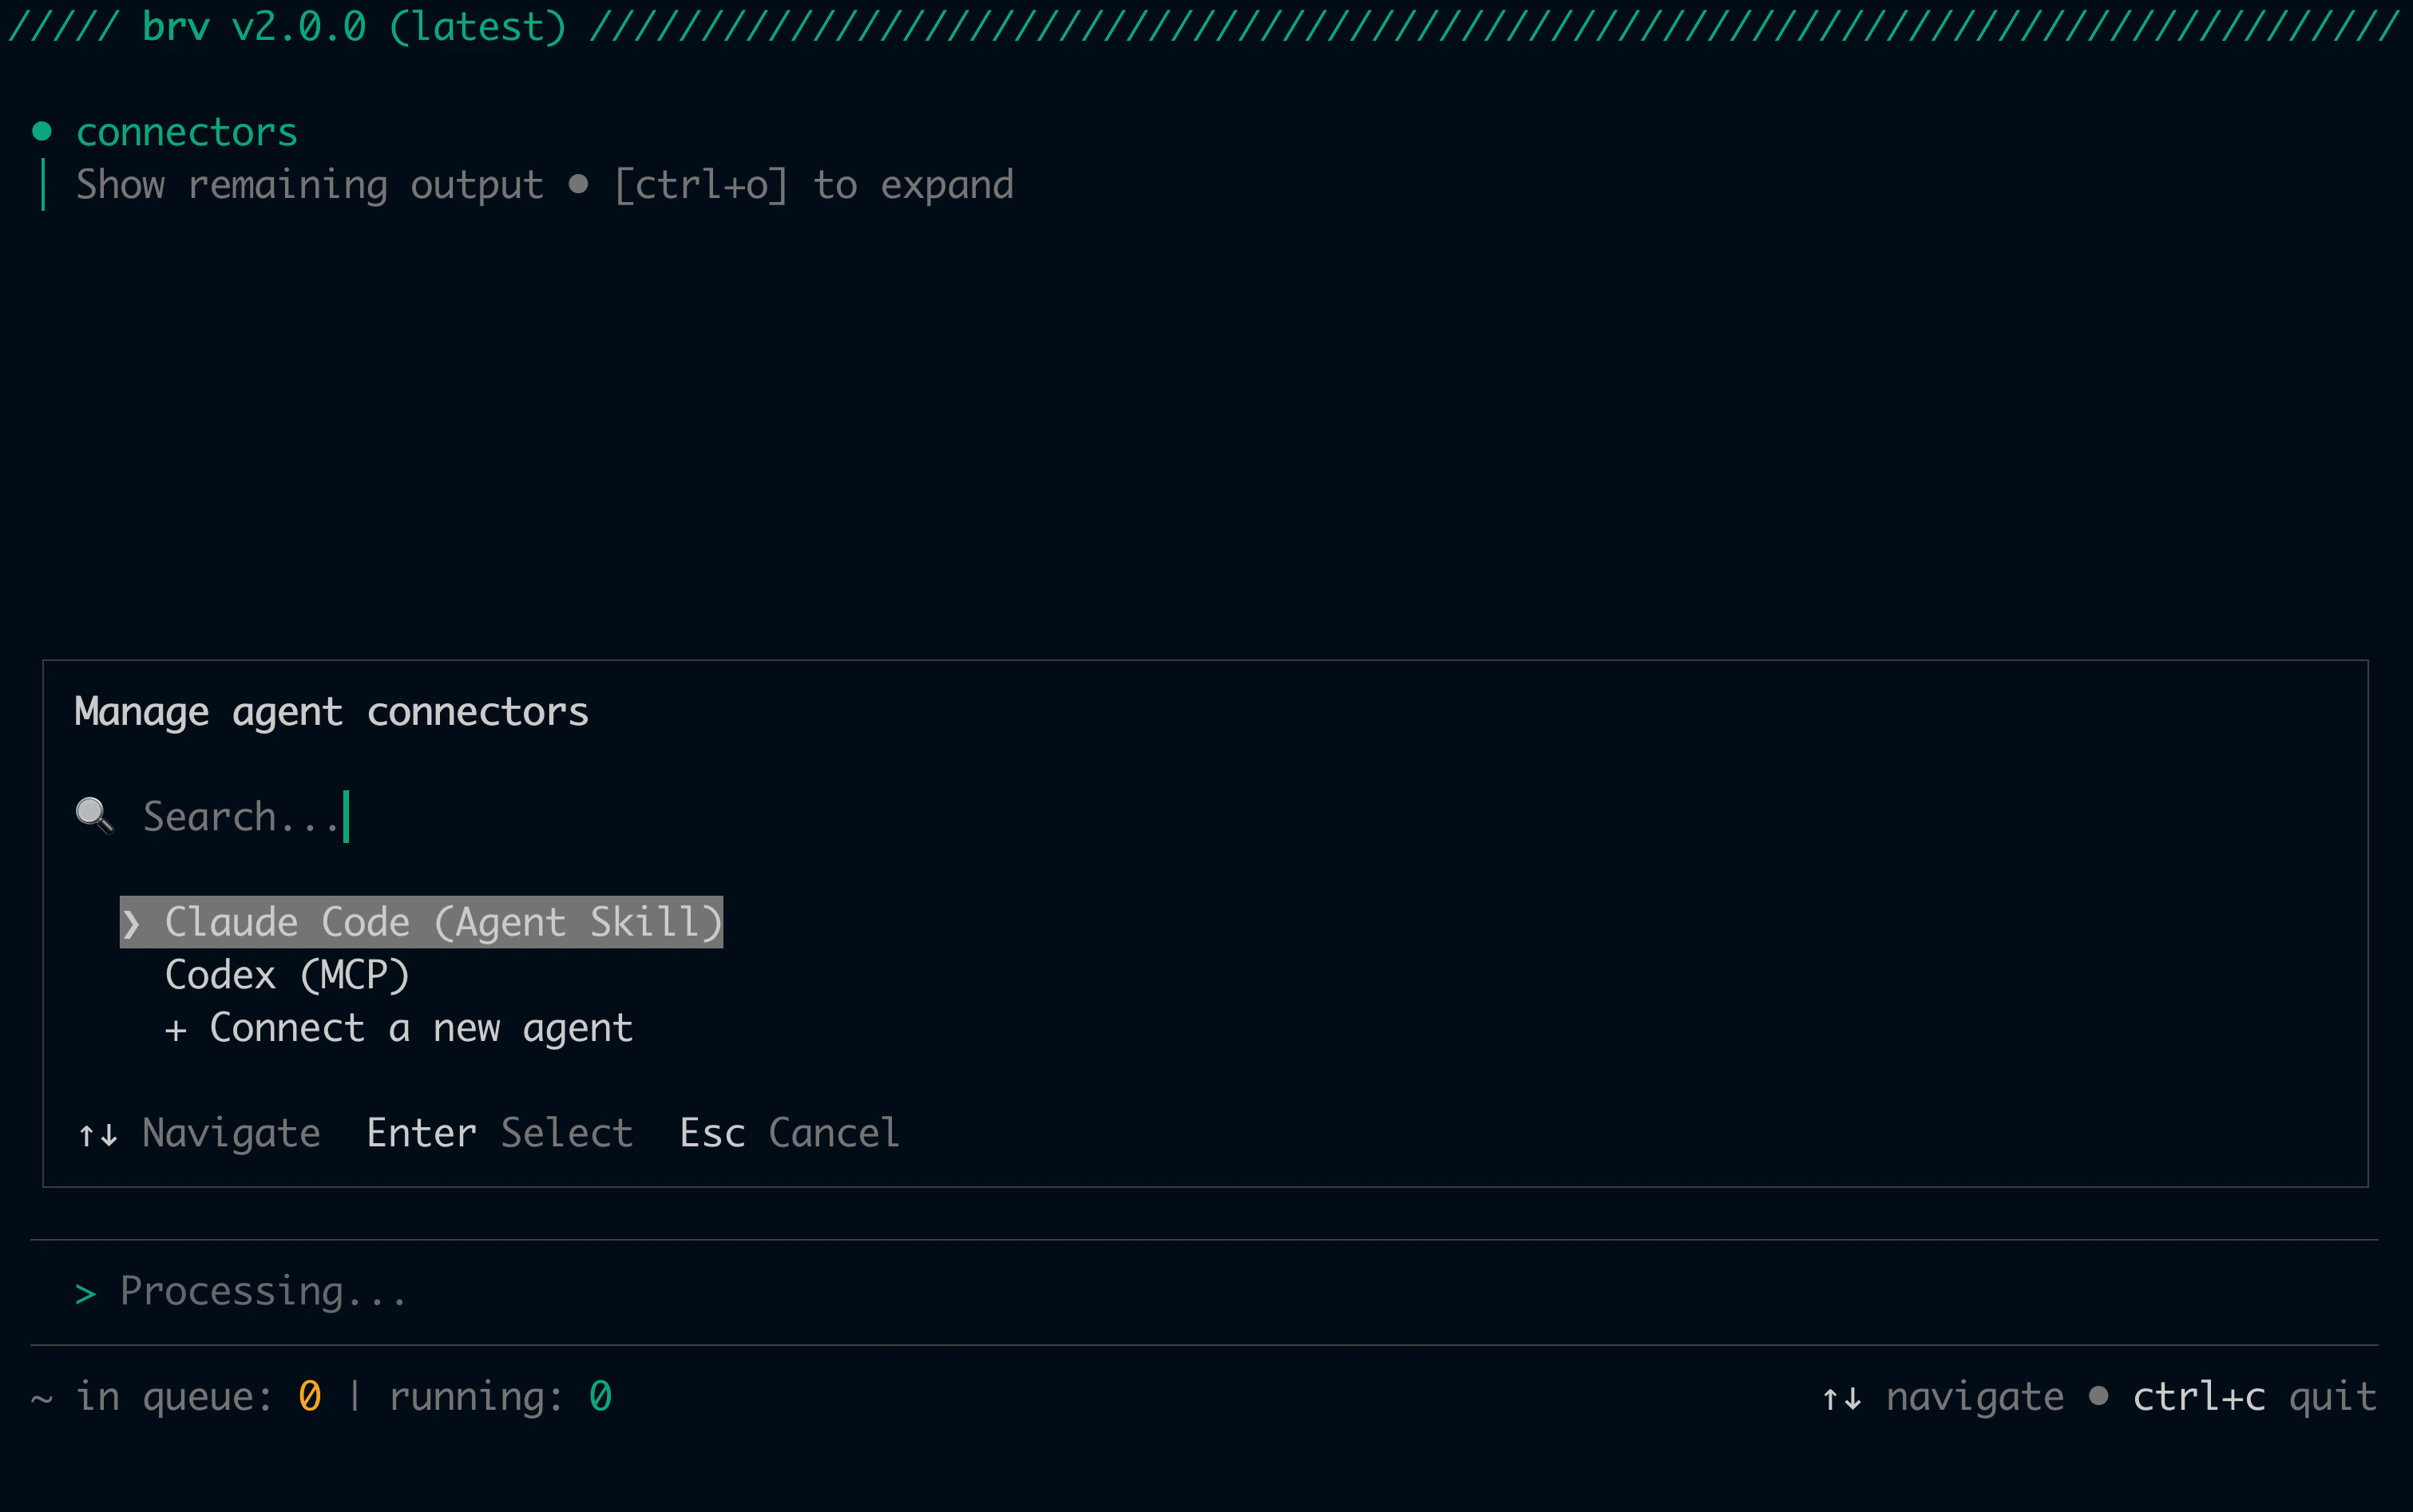 Choose your coding agent from the list. ByteRover automatically picks the best connector type for it — no configuration needed.
Install a connector for your coding agent:
```bash theme={null}
brv connectors install "Claude Code"
```
ByteRover automatically selects the best connector type. To override:
```bash theme={null}
brv connectors install "Claude Code" --type mcp
```
Available types: `skill`, `hook`, `mcp`, `rules`.
See all installed connectors:
```bash theme={null}
brv connectors list
```
ByteRover picks the best connector type for each agent automatically:
* **Skill (default for most agents)** — Claude Code, Cursor, Windsurf, Codex, Gemini CLI, GitHub Copilot, Kilo Code, Roo Code, Amp, Kiro, Junie, Antigravity, Qoder, Trae.ai, Auggie CLI, OpenClaude, OpenClaw, OpenCode, Warp
* **MCP (default for 5 agents)** — Augment Code, Claude Desktop, Cline, Qwen Code, Zed
Other types are available as alternatives when installing manually:
* **Hook** — Claude Code only (hooks into Claude Code's prompt-submit lifecycle)
* **Rules** — Any agent that supports rules files
For a full breakdown of connector types and supported agents, see [Agent Connectors](/connectors/overview).
## Step 4: Add your first context
### Via your coding agent
Ask your coding agent (Cursor, Claude Code, Windsurf, etc.) to curate context for you:
```
> Use brv curate command to curate essential contexts of this project's unit testing strategy. Make sure that unit tests run fast and run completely in memory.
```
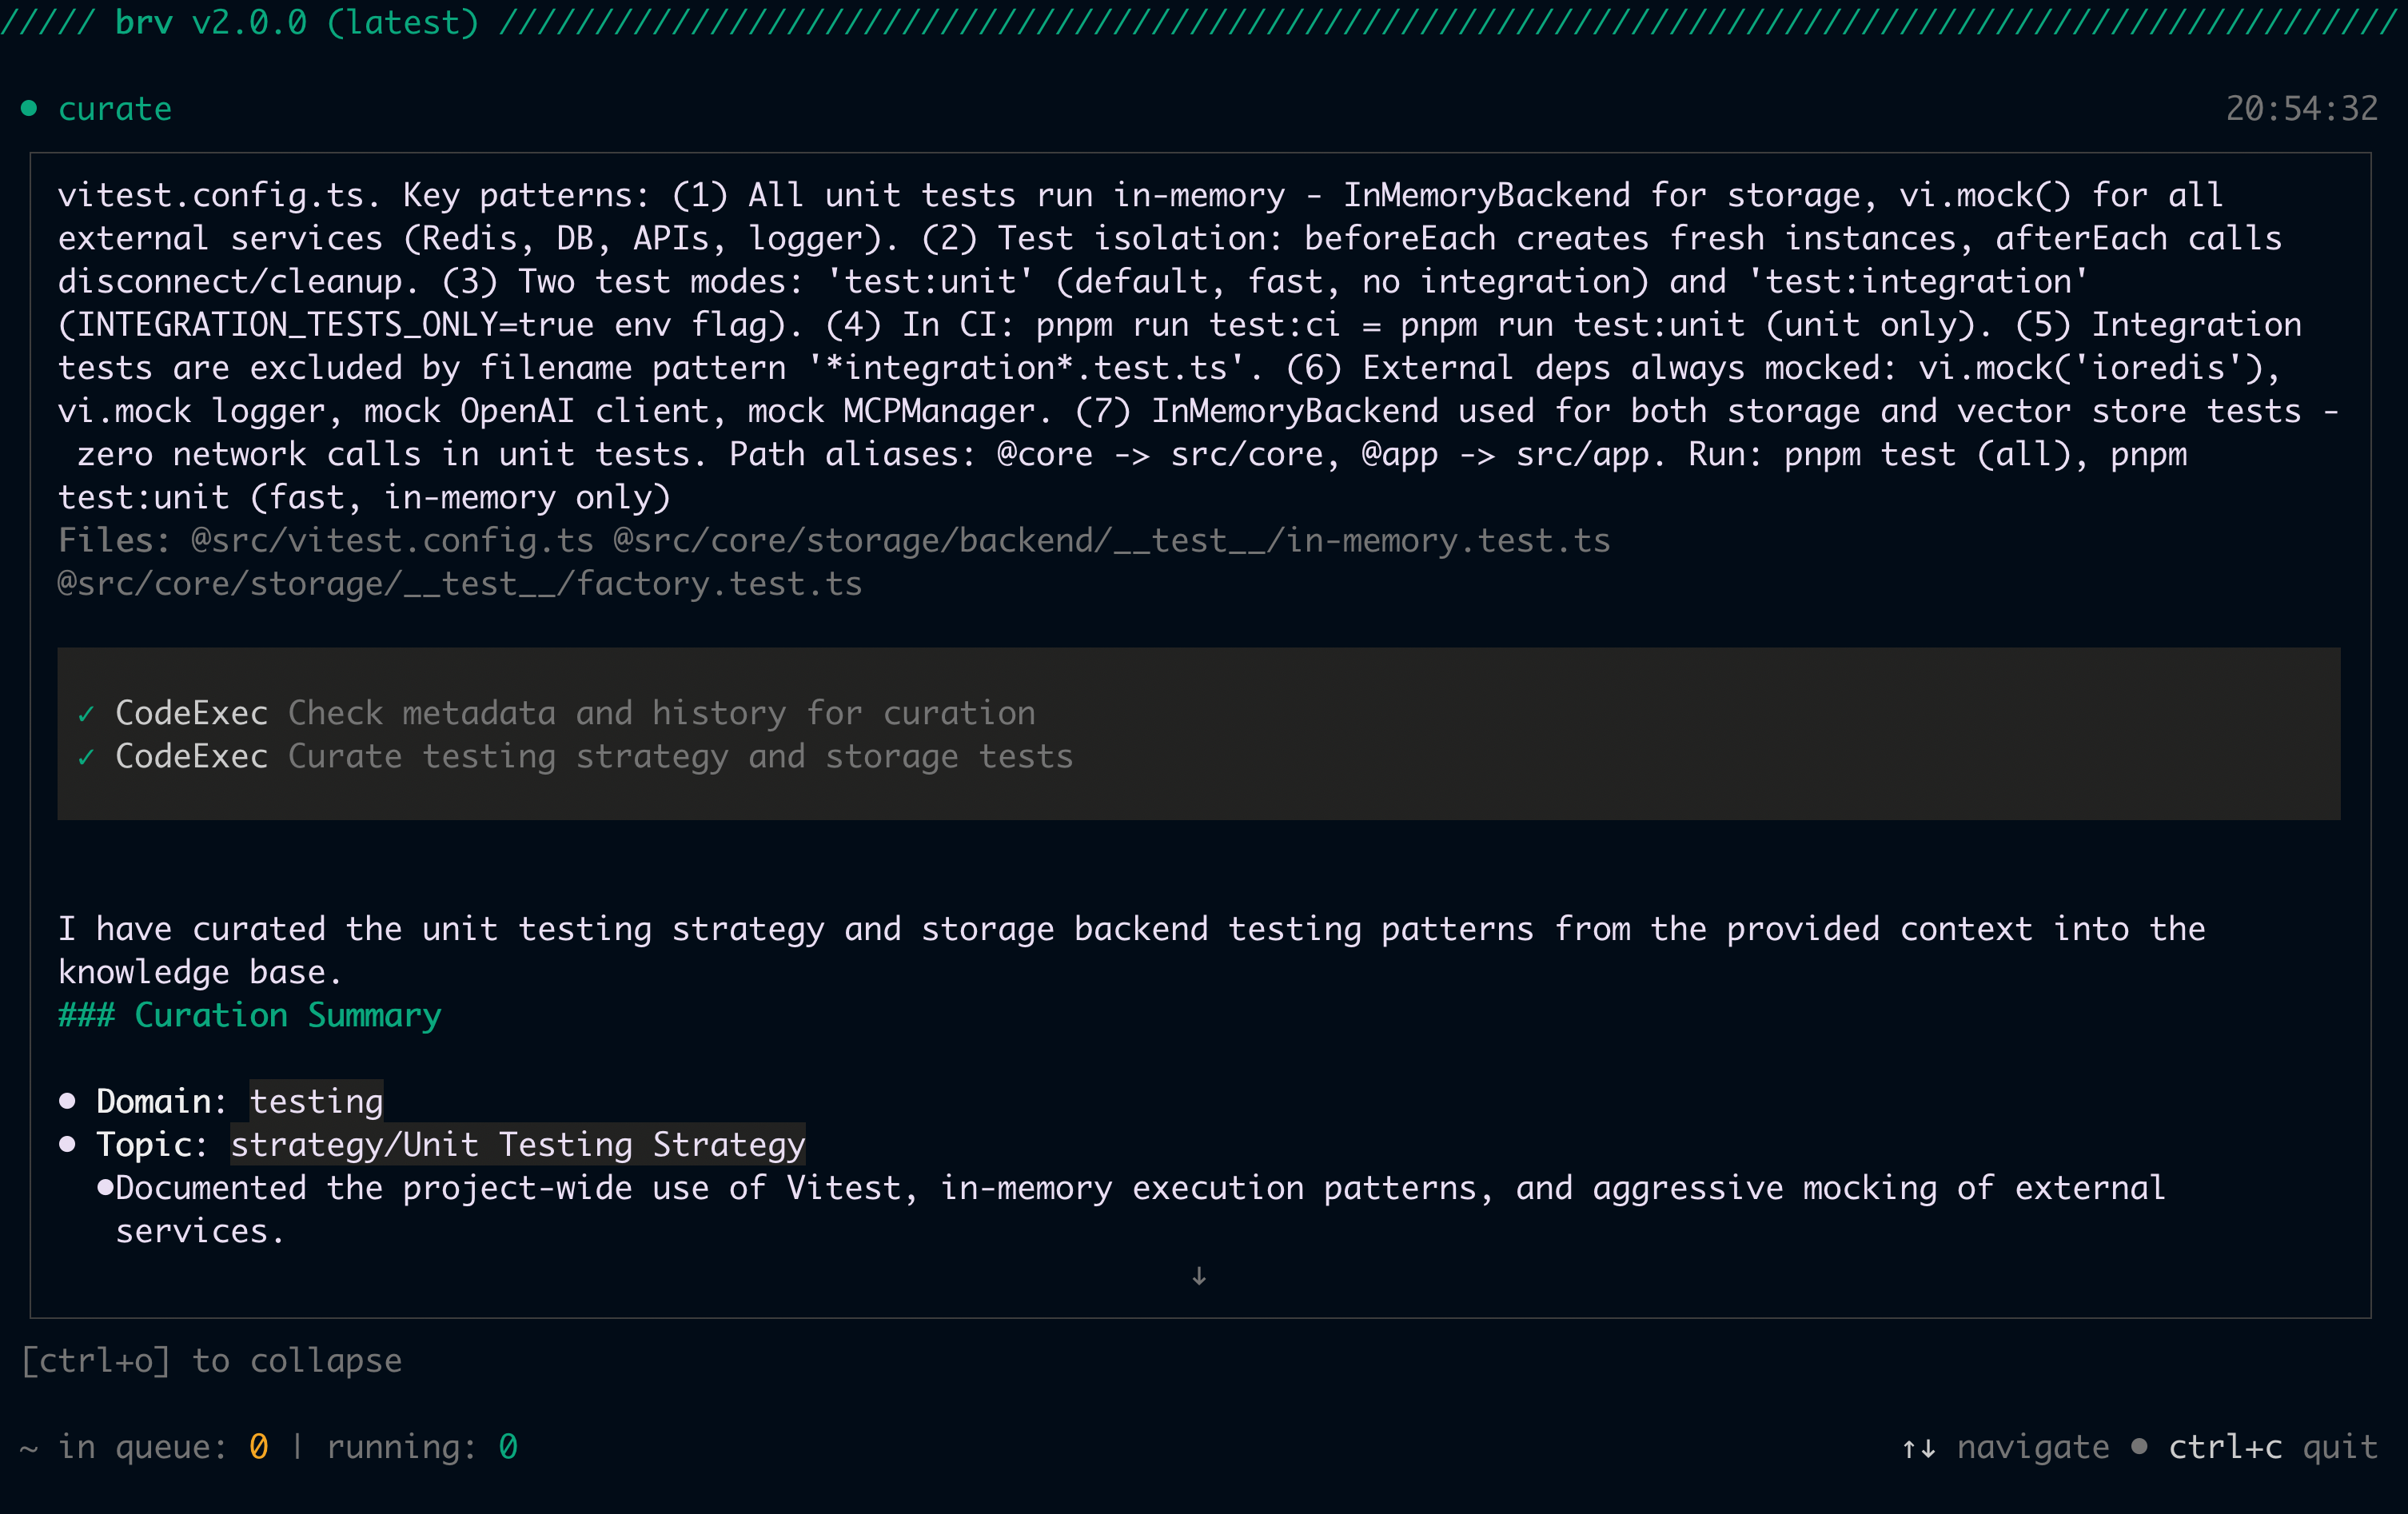
Your coding agent will analyze the codebase and call `brv curate` automatically.
You can follow the operation in progress in ByteRover's TUI. Press `Ctrl+O` to expand the full response:
Choose your coding agent from the list. ByteRover automatically picks the best connector type for it — no configuration needed.
Install a connector for your coding agent:
```bash theme={null}
brv connectors install "Claude Code"
```
ByteRover automatically selects the best connector type. To override:
```bash theme={null}
brv connectors install "Claude Code" --type mcp
```
Available types: `skill`, `hook`, `mcp`, `rules`.
See all installed connectors:
```bash theme={null}
brv connectors list
```
ByteRover picks the best connector type for each agent automatically:
* **Skill (default for most agents)** — Claude Code, Cursor, Windsurf, Codex, Gemini CLI, GitHub Copilot, Kilo Code, Roo Code, Amp, Kiro, Junie, Antigravity, Qoder, Trae.ai, Auggie CLI, OpenClaude, OpenClaw, OpenCode, Warp
* **MCP (default for 5 agents)** — Augment Code, Claude Desktop, Cline, Qwen Code, Zed
Other types are available as alternatives when installing manually:
* **Hook** — Claude Code only (hooks into Claude Code's prompt-submit lifecycle)
* **Rules** — Any agent that supports rules files
For a full breakdown of connector types and supported agents, see [Agent Connectors](/connectors/overview).
## Step 4: Add your first context
### Via your coding agent
Ask your coding agent (Cursor, Claude Code, Windsurf, etc.) to curate context for you:
```
> Use brv curate command to curate essential contexts of this project's unit testing strategy. Make sure that unit tests run fast and run completely in memory.
```
Your coding agent will analyze the codebase and call `brv curate` automatically.
You can follow the operation in progress in ByteRover's TUI. Press `Ctrl+O` to expand the full response:
 ### Manual
Type `/curate` followed by your context description. Be specific — the more precise your input, the more useful the stored context:
```
/curate make sure that unit tests run fast and run completely in memory
```
Run `brv curate` with your context description as a quoted string:
```bash theme={null}
brv curate "make sure that unit tests run fast and run completely in memory"
```
### Context tree
ByteRover organizes curated context into structured domains (e.g., `testing`, `architecture`, `database`) inside a local context tree at `.brv/context-tree`:
### Manual
Type `/curate` followed by your context description. Be specific — the more precise your input, the more useful the stored context:
```
/curate make sure that unit tests run fast and run completely in memory
```
Run `brv curate` with your context description as a quoted string:
```bash theme={null}
brv curate "make sure that unit tests run fast and run completely in memory"
```
### Context tree
ByteRover organizes curated context into structured domains (e.g., `testing`, `architecture`, `database`) inside a local context tree at `.brv/context-tree`:
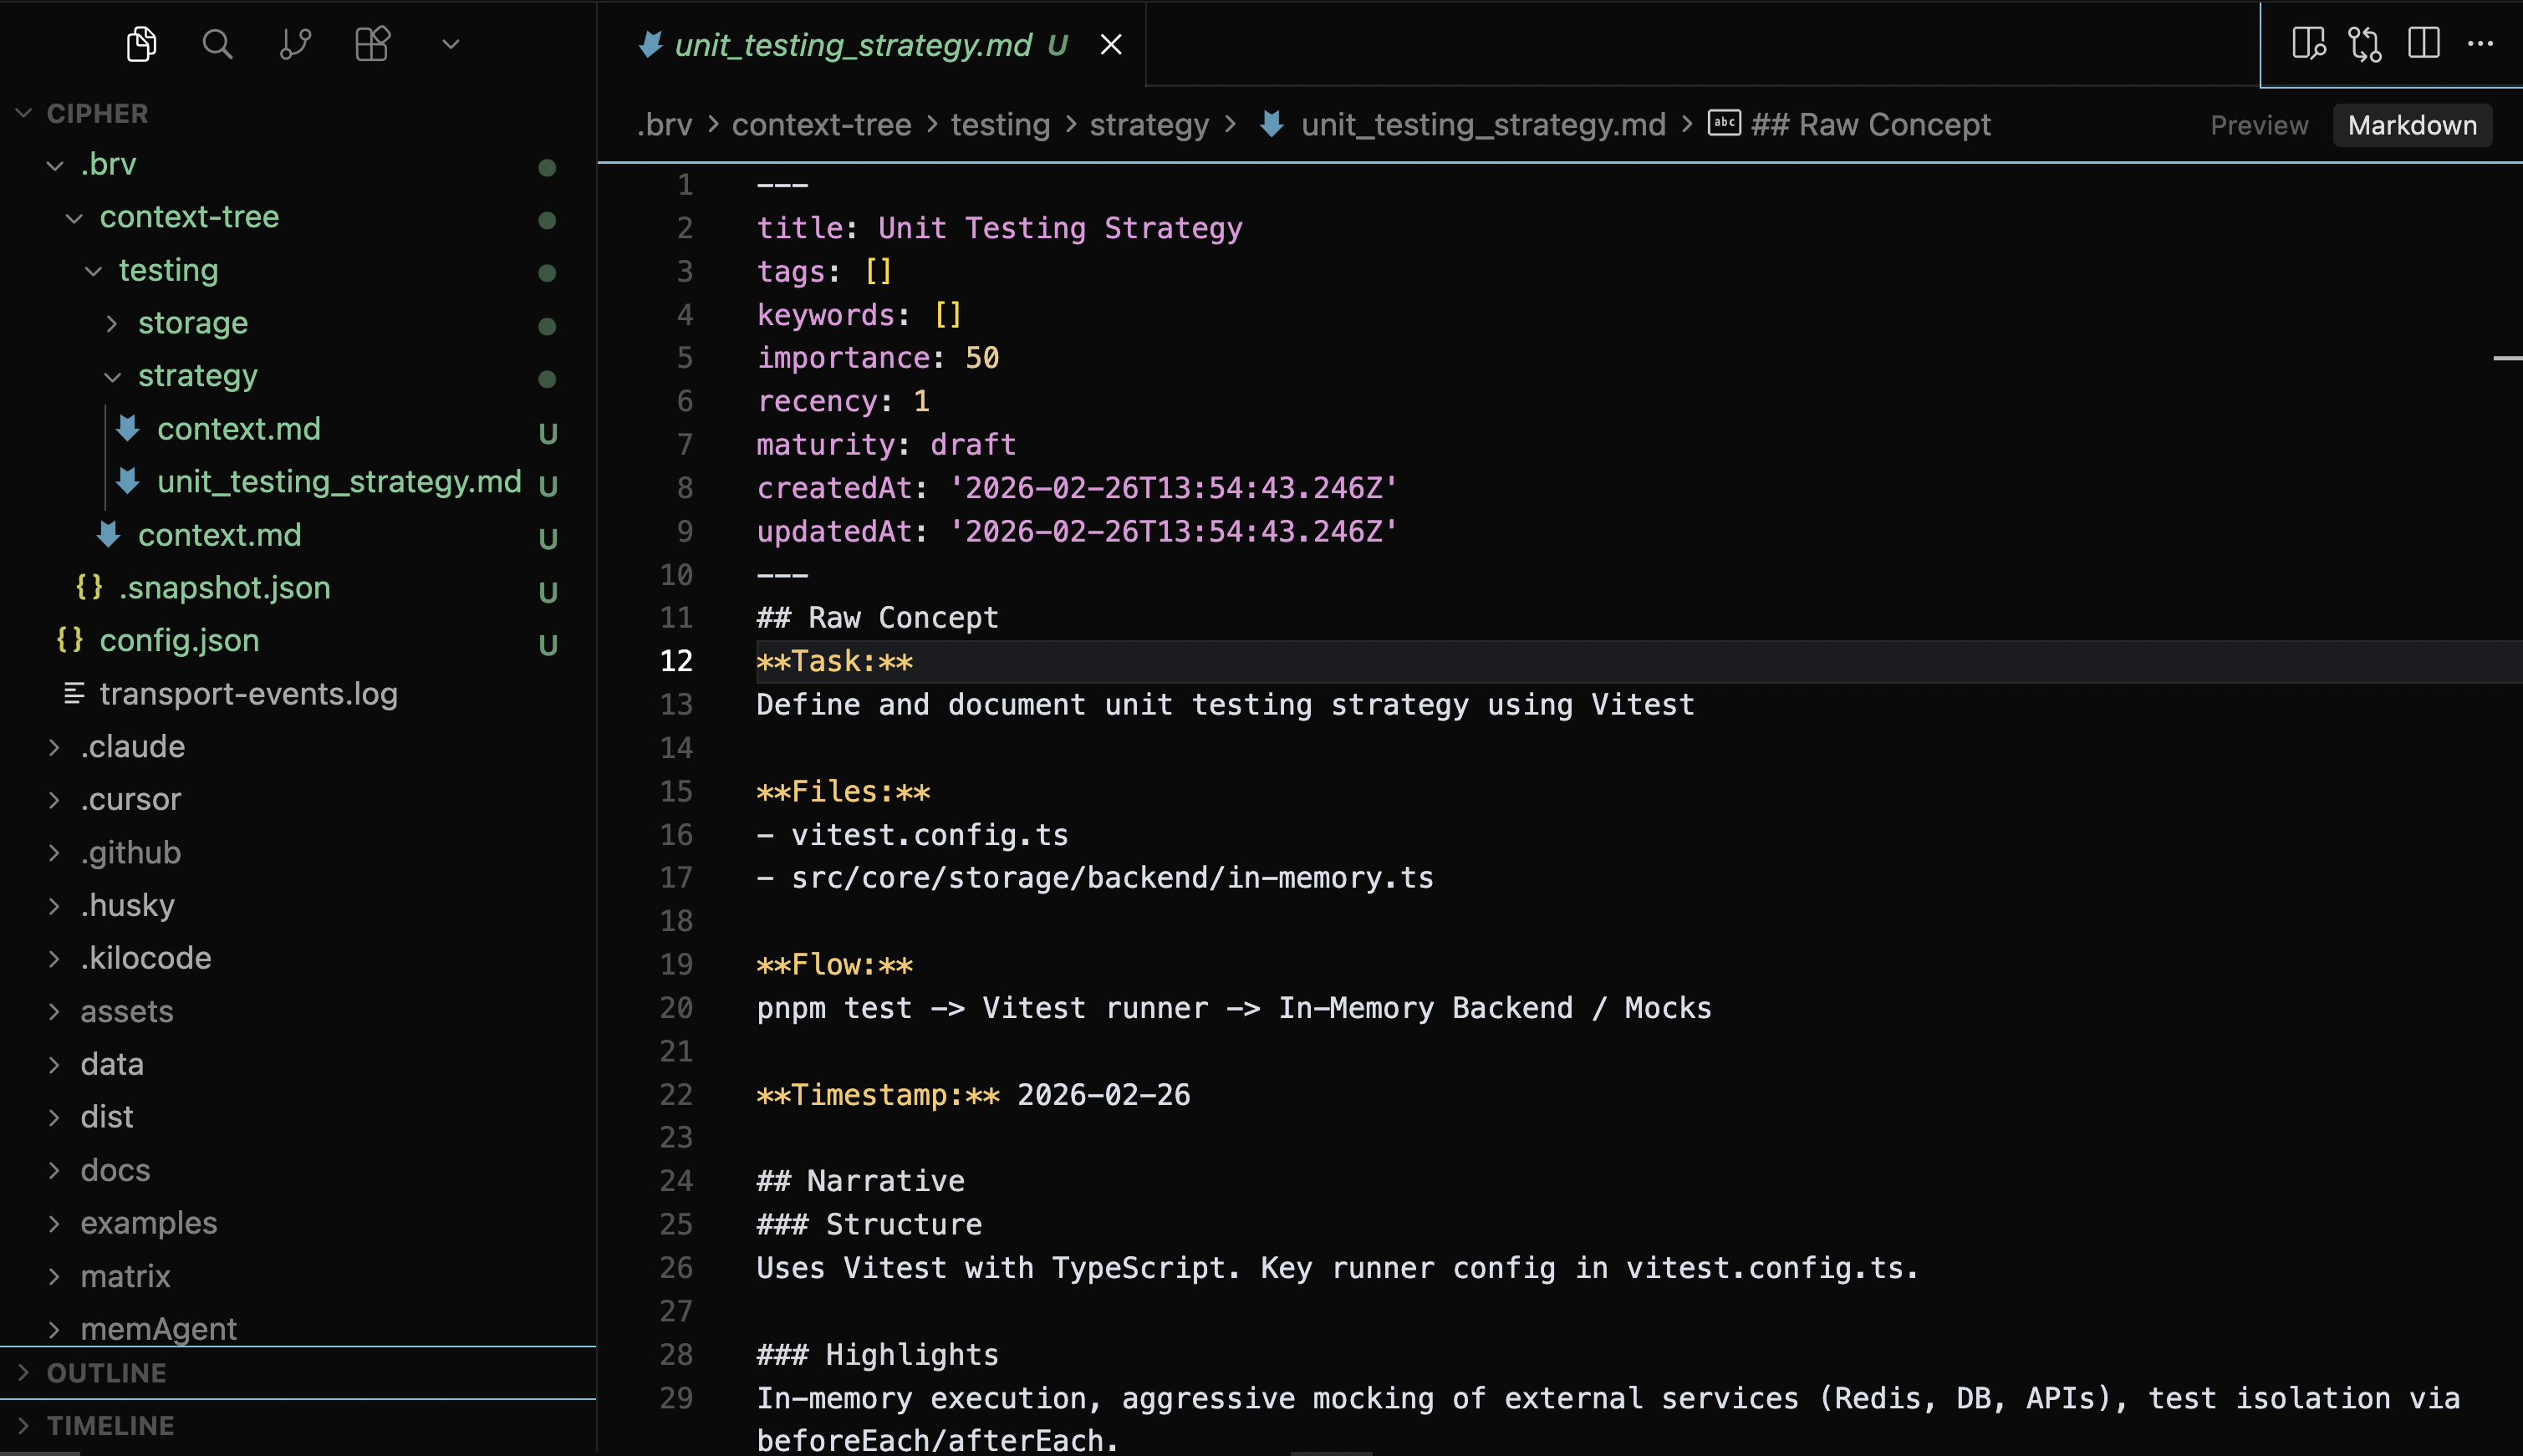 To learn more, see [Local Context Tree Structure](/context-tree/local-space-structure).
## Step 5: Query context
### Via your coding agent
Ask your coding agent to retrieve context before implementing:
```
> Use brv query command to check what unit testing strategies are in this project
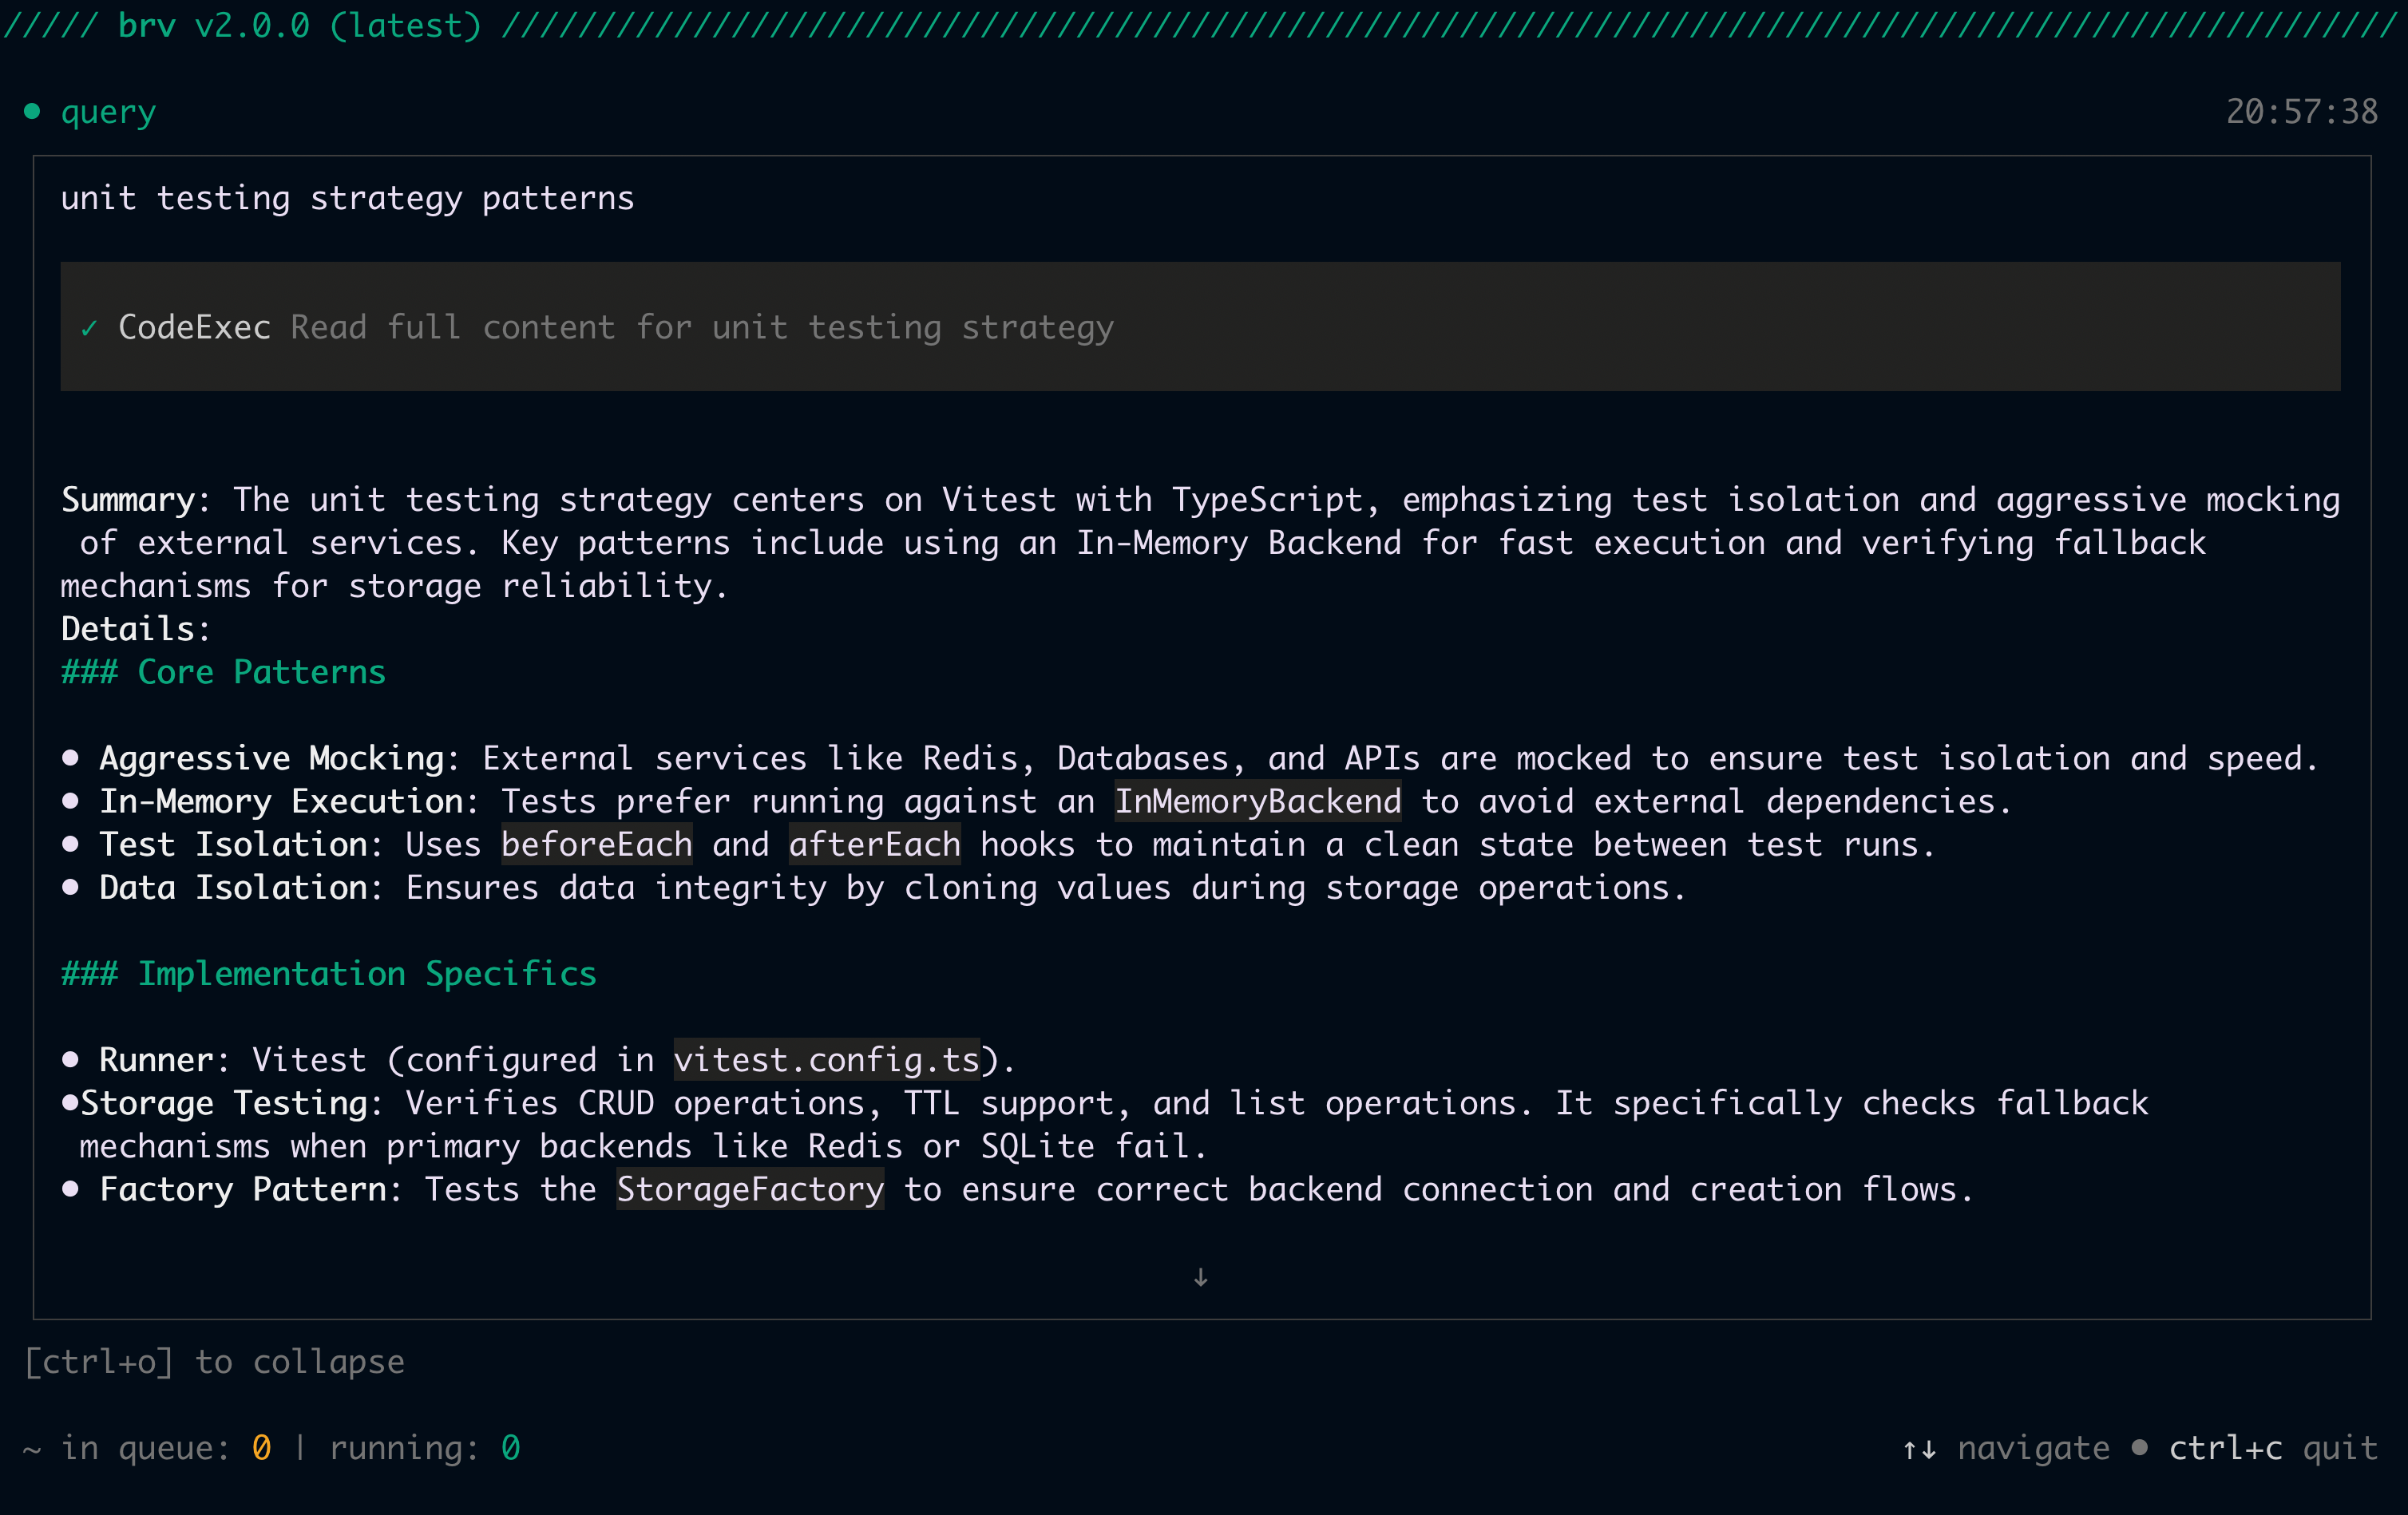
```
Your coding agent will run `brv query`, and ByteRover will return the most relevant context curated earlier:
To learn more, see [Local Context Tree Structure](/context-tree/local-space-structure).
## Step 5: Query context
### Via your coding agent
Ask your coding agent to retrieve context before implementing:
```
> Use brv query command to check what unit testing strategies are in this project
```
Your coding agent will run `brv query`, and ByteRover will return the most relevant context curated earlier:
 ### Manual
Type `/query` followed by your question directly in the ByteRover TUI:
```
/query What are the unit testing strategies in this project?
```
Run `brv query` with your question as a quoted string:
```bash theme={null}
brv query "What are the unit testing strategies in this project?"
```
**Codex users: network access required**
Codex runs in a sandboxed mode without internet access by default. To use ByteRover CLI commands:
1. Switch to **Agent (full access) mode**, or
2. Approve network access when prompted by adding to your prompt: *"You can ask me about network access and I will allow it"*
***
**You're all set.** ByteRover is now capturing and retrieving context for your coding agents.
## Optional: Version control and cloud sync
The steps below are optional. They let you track changes to your context tree with Git-Semantic version control, and optionally sync to the cloud for team collaboration.
### Initialize version control
```bash theme={null}
brv vc init
```
Configure your commit identity:
```bash theme={null}
brv vc config user.name "Your Name"
brv vc config user.email "you@example.com"
```
```
/vc init
/vc config user.name "Your Name"
/vc config user.email "you@example.com"
```
If you plan to join an existing team space, use `brv vc clone` instead — see [Clone a remote space](#clone-a-remote-space) below. Cloning initializes version control automatically.
### Stage and commit your changes
After curating context, save a snapshot with version control:
```bash theme={null}
brv vc add .
brv vc commit -m "add initial project context"
```
```
/vc add .
/vc commit -m "add initial project context"
```
Check the status of your working tree at any time:
```bash theme={null}
brv vc status
```
```
/vc status
```
### Push to cloud
Sync your context tree to ByteRover cloud for team collaboration and backup:
```
/login
```
```
/vc remote add origin https://byterover.dev//.git
/vc push -u origin main
```
```bash theme={null}
# Opens your browser for OAuth (default)
brv login
# On CI or a remote shell, pass an API key instead
brv login --api-key
```
```bash theme={null}
brv vc remote add origin https://byterover.dev//.git
brv vc push -u origin main
```
Get your API key from [app.byterover.dev/settings/keys](https://app.byterover.dev/settings/keys). Find your clone URL on the space's page in the [ByteRover Dashboard](https://app.byterover.dev).
### Clone a remote space
To join an existing team project, clone it instead of initializing from scratch:
```
/vc clone https://byterover.dev//.git
/vc config user.name "Your Name"
/vc config user.email "you@example.com"
```
Or omit the URL to open an interactive space picker:
```
/vc clone
```
```bash theme={null}
brv vc clone https://byterover.dev//.git
brv vc config user.name "Your Name"
brv vc config user.email "you@example.com"
```
Cloning downloads the full context tree with its complete commit history. Version control is already initialized — you don't need to run `vc init`.
## Next steps
Push, pull, and collaborate with teammates using Git-Semantic version control
Best practices for adding context effectively
Master context retrieval techniques
Full guide to branching, merging, and remote sync
### Manual
Type `/query` followed by your question directly in the ByteRover TUI:
```
/query What are the unit testing strategies in this project?
```
Run `brv query` with your question as a quoted string:
```bash theme={null}
brv query "What are the unit testing strategies in this project?"
```
**Codex users: network access required**
Codex runs in a sandboxed mode without internet access by default. To use ByteRover CLI commands:
1. Switch to **Agent (full access) mode**, or
2. Approve network access when prompted by adding to your prompt: *"You can ask me about network access and I will allow it"*
***
**You're all set.** ByteRover is now capturing and retrieving context for your coding agents.
## Optional: Version control and cloud sync
The steps below are optional. They let you track changes to your context tree with Git-Semantic version control, and optionally sync to the cloud for team collaboration.
### Initialize version control
```bash theme={null}
brv vc init
```
Configure your commit identity:
```bash theme={null}
brv vc config user.name "Your Name"
brv vc config user.email "you@example.com"
```
```
/vc init
/vc config user.name "Your Name"
/vc config user.email "you@example.com"
```
If you plan to join an existing team space, use `brv vc clone` instead — see [Clone a remote space](#clone-a-remote-space) below. Cloning initializes version control automatically.
### Stage and commit your changes
After curating context, save a snapshot with version control:
```bash theme={null}
brv vc add .
brv vc commit -m "add initial project context"
```
```
/vc add .
/vc commit -m "add initial project context"
```
Check the status of your working tree at any time:
```bash theme={null}
brv vc status
```
```
/vc status
```
### Push to cloud
Sync your context tree to ByteRover cloud for team collaboration and backup:
```
/login
```
```
/vc remote add origin https://byterover.dev//.git
/vc push -u origin main
```
```bash theme={null}
# Opens your browser for OAuth (default)
brv login
# On CI or a remote shell, pass an API key instead
brv login --api-key
```
```bash theme={null}
brv vc remote add origin https://byterover.dev//.git
brv vc push -u origin main
```
Get your API key from [app.byterover.dev/settings/keys](https://app.byterover.dev/settings/keys). Find your clone URL on the space's page in the [ByteRover Dashboard](https://app.byterover.dev).
### Clone a remote space
To join an existing team project, clone it instead of initializing from scratch:
```
/vc clone https://byterover.dev//.git
/vc config user.name "Your Name"
/vc config user.email "you@example.com"
```
Or omit the URL to open an interactive space picker:
```
/vc clone
```
```bash theme={null}
brv vc clone https://byterover.dev//.git
brv vc config user.name "Your Name"
brv vc config user.email "you@example.com"
```
Cloning downloads the full context tree with its complete commit history. Version control is already initialized — you don't need to run `vc init`.
## Next steps
Push, pull, and collaborate with teammates using Git-Semantic version control
Best practices for adding context effectively
Master context retrieval techniques
Full guide to branching, merging, and remote sync